
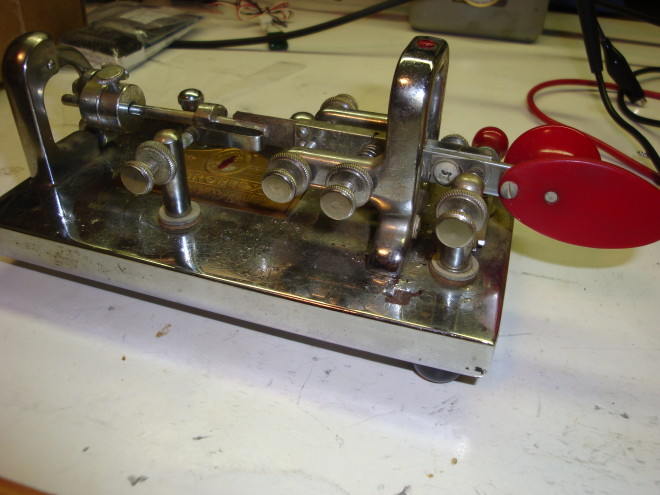
Every once in a while I like to have fun restoring old equipment, and last weekend I finally got around to restoring an 1957 Vibroplex “Original” Bug. I bought it because it was inexpensive, unrestored and complete…and it was made the year I was born. And unlike me, it didn’t have modifications and missing parts. Here is what it looked like last week before restoration:
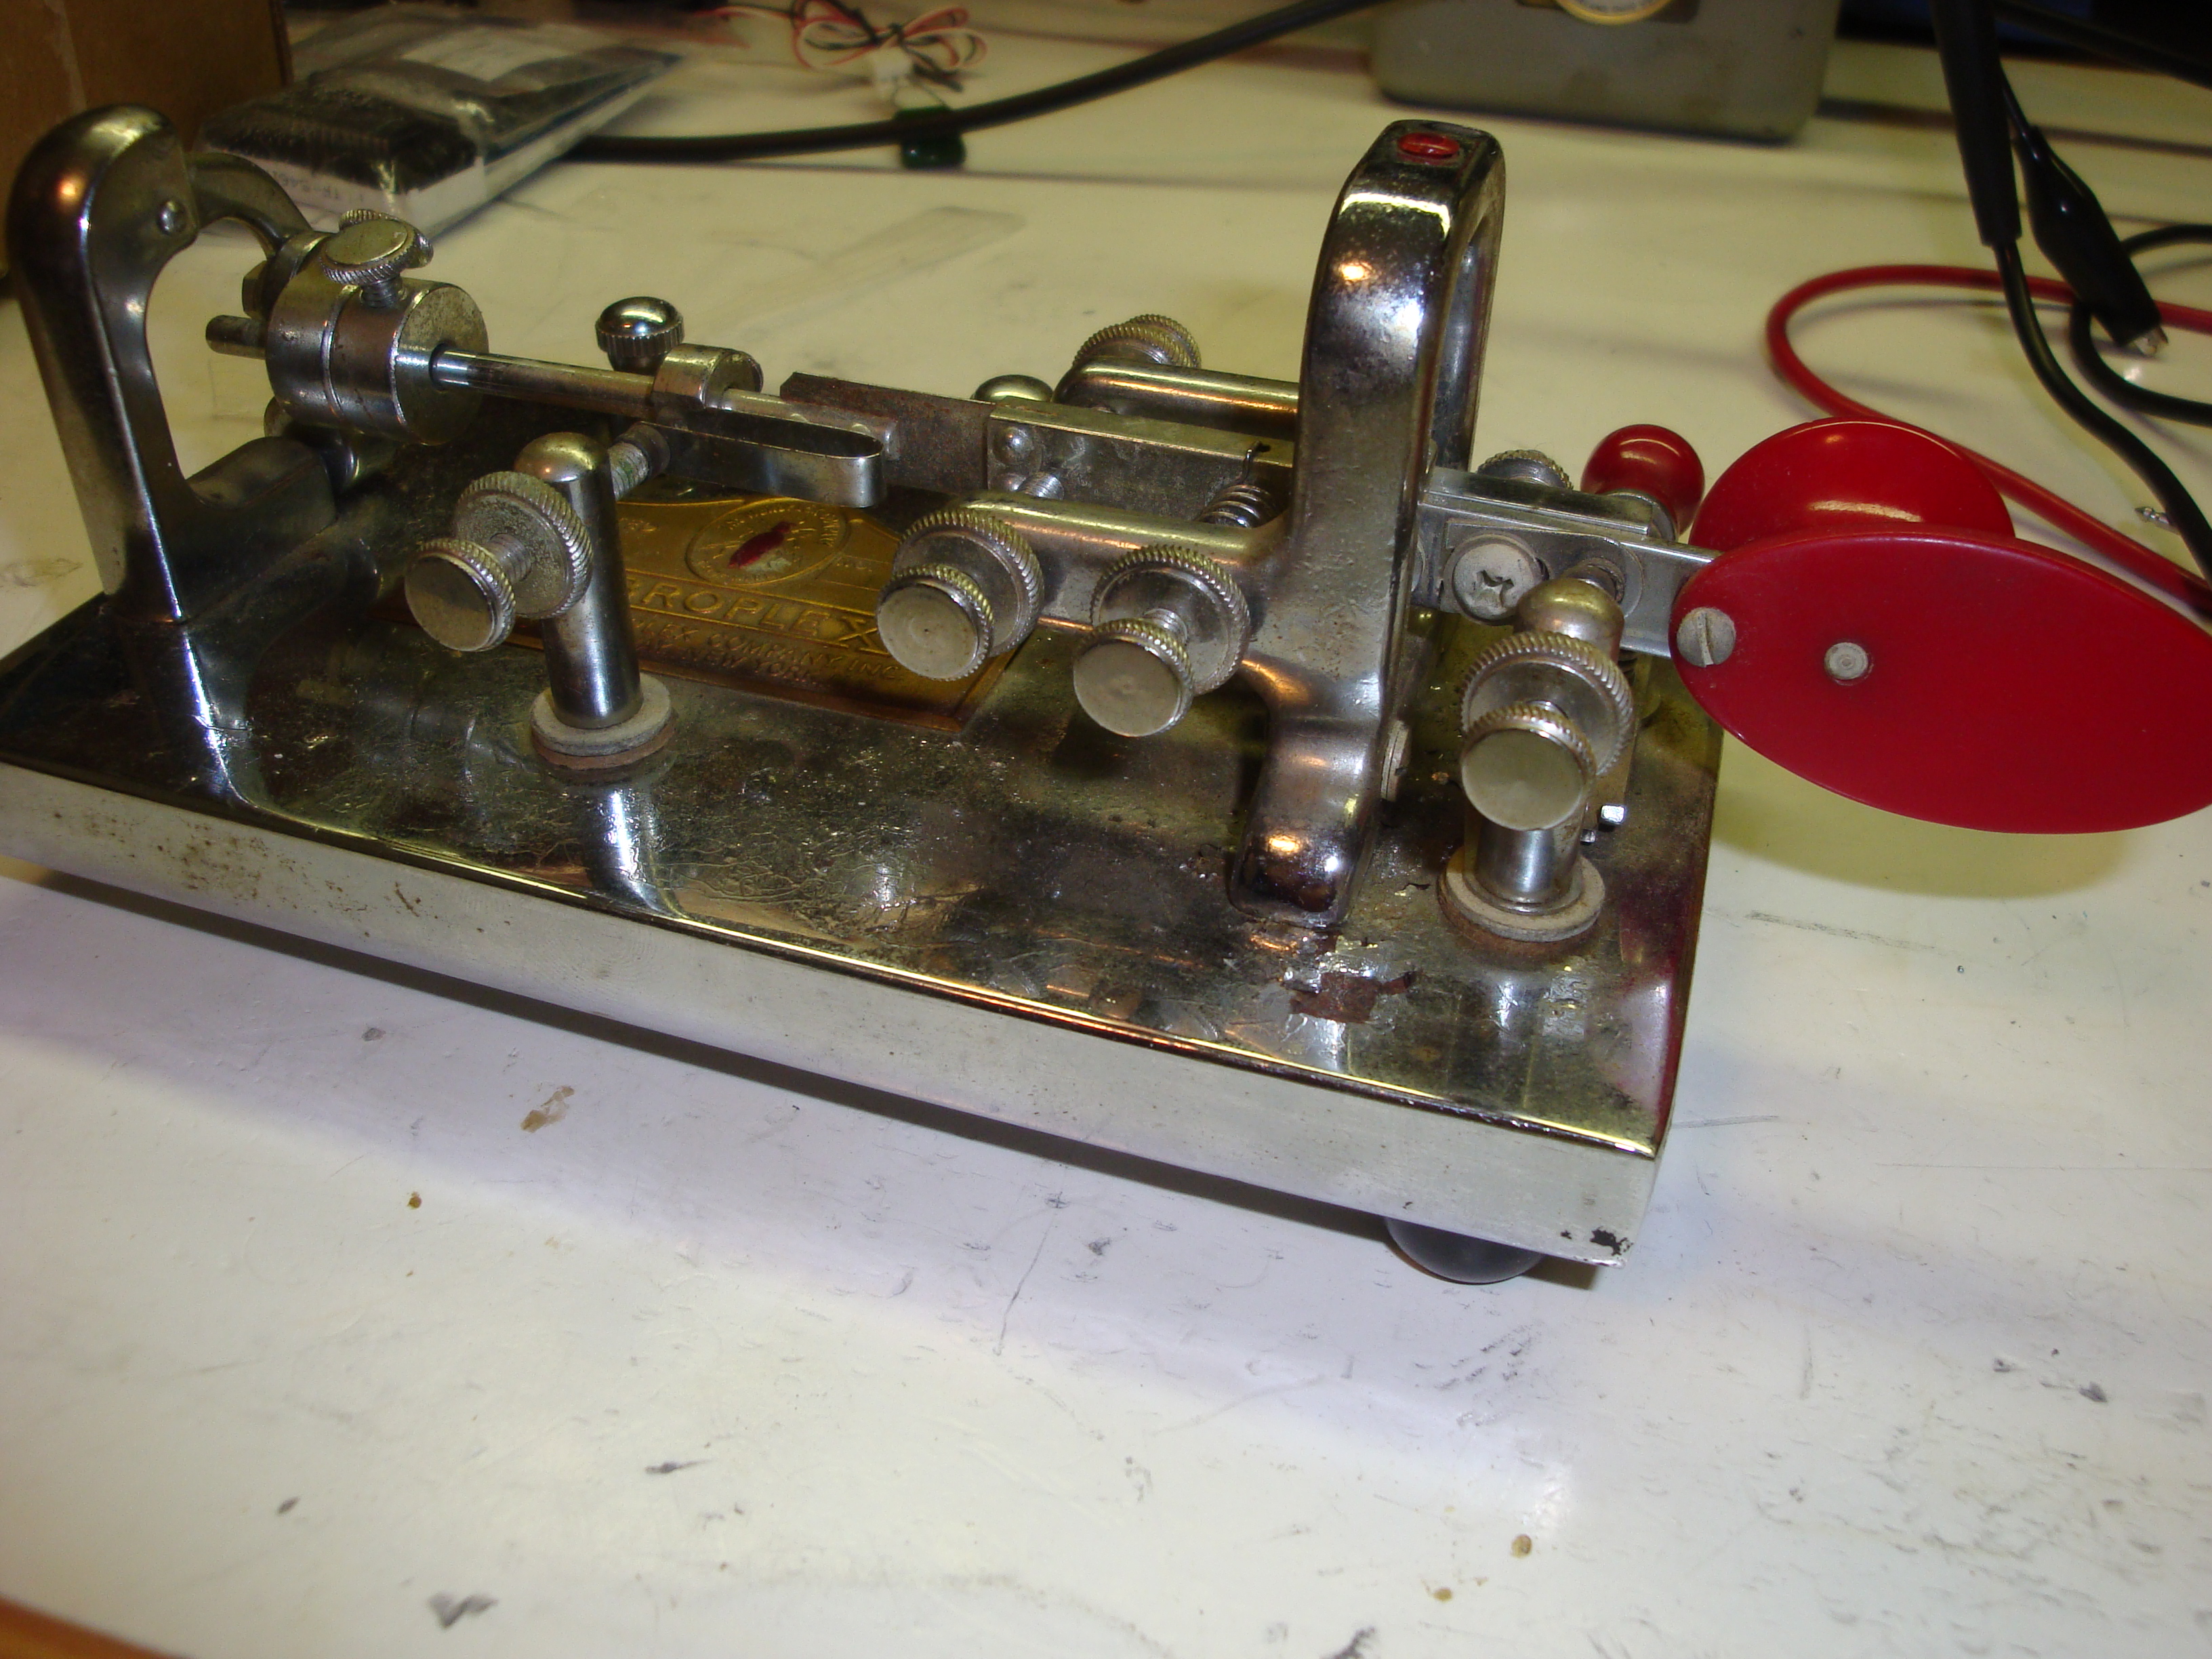
1957 “Original” Unrestored. (click for new window)
I realized very quickly the base needed re-chroming, but I didn’t want to pull it all apart and have it sitting as parts in a box for weeks while the base was being redone, I wanted to use it. As an additional thought on that issue, as busy as I can get, if a project sits in a box it often does just that…for a while. Bottom line: I bought a new base from Vibroplex. I’ll have the original “Original” base re-chromed eventually…maybe.
Some notes about getting a replacement base from Vibroplex: The quality is pretty good, but the base does not have the #8-32 tapped hole for the tuning switch assy. and I had to layout, drill and tap one. Also, the holes for all of the electrical contact posts are smaller than are the original, so the original fiber insulating shoulder bushings will not fit. You should buy the Vibroplex replacement bushings when you order the base. In addition, the holes pre-drilled for the Vibroplex label are the wrong diameter and in the incorrect place, at least for this 1957 vintage label. I don’t know when this was changed, but at least on my bug I had to drill two #50 holes (0.070″) in the old positions to mount the label.
I looked on line for Vibroplex restoration details and found W.R.Smith’s site, so I bought his book and polish. The book is very informative and reflects many years of experience, especially with the older pre-WWII Bugs. The polish does indeed work well, it’s formulation seems similar to another metal polish I have used with one big difference: the base fluidizing agent is oil, not water. As a result it stays liquid and doesn’t evaporate, so you can stay polishing longer. This is a great advantage if it is needed. One down side is the oily film it leaves, which as he states can be removed with baking powder or corn starch. One way or the other it is not a big issue.
A anyone who has refinished anything from an old car to old furniture knows: prep work prior to putting a new finish on is the key (CW pun intended). I used a Dremel tool with various buffs and the W.R. Smith polish on everything and got great results. On many pieces the finish wore through before the pits or tarnish was gone. I selectively plated pendulum parts and washers with nickel, and the electrical connecting straps on the bottom with a tin/zinc plate. I wanted the project to only take the one day, so I intentionally left a few parts in less-than-perfect, but looking-very-good condition.
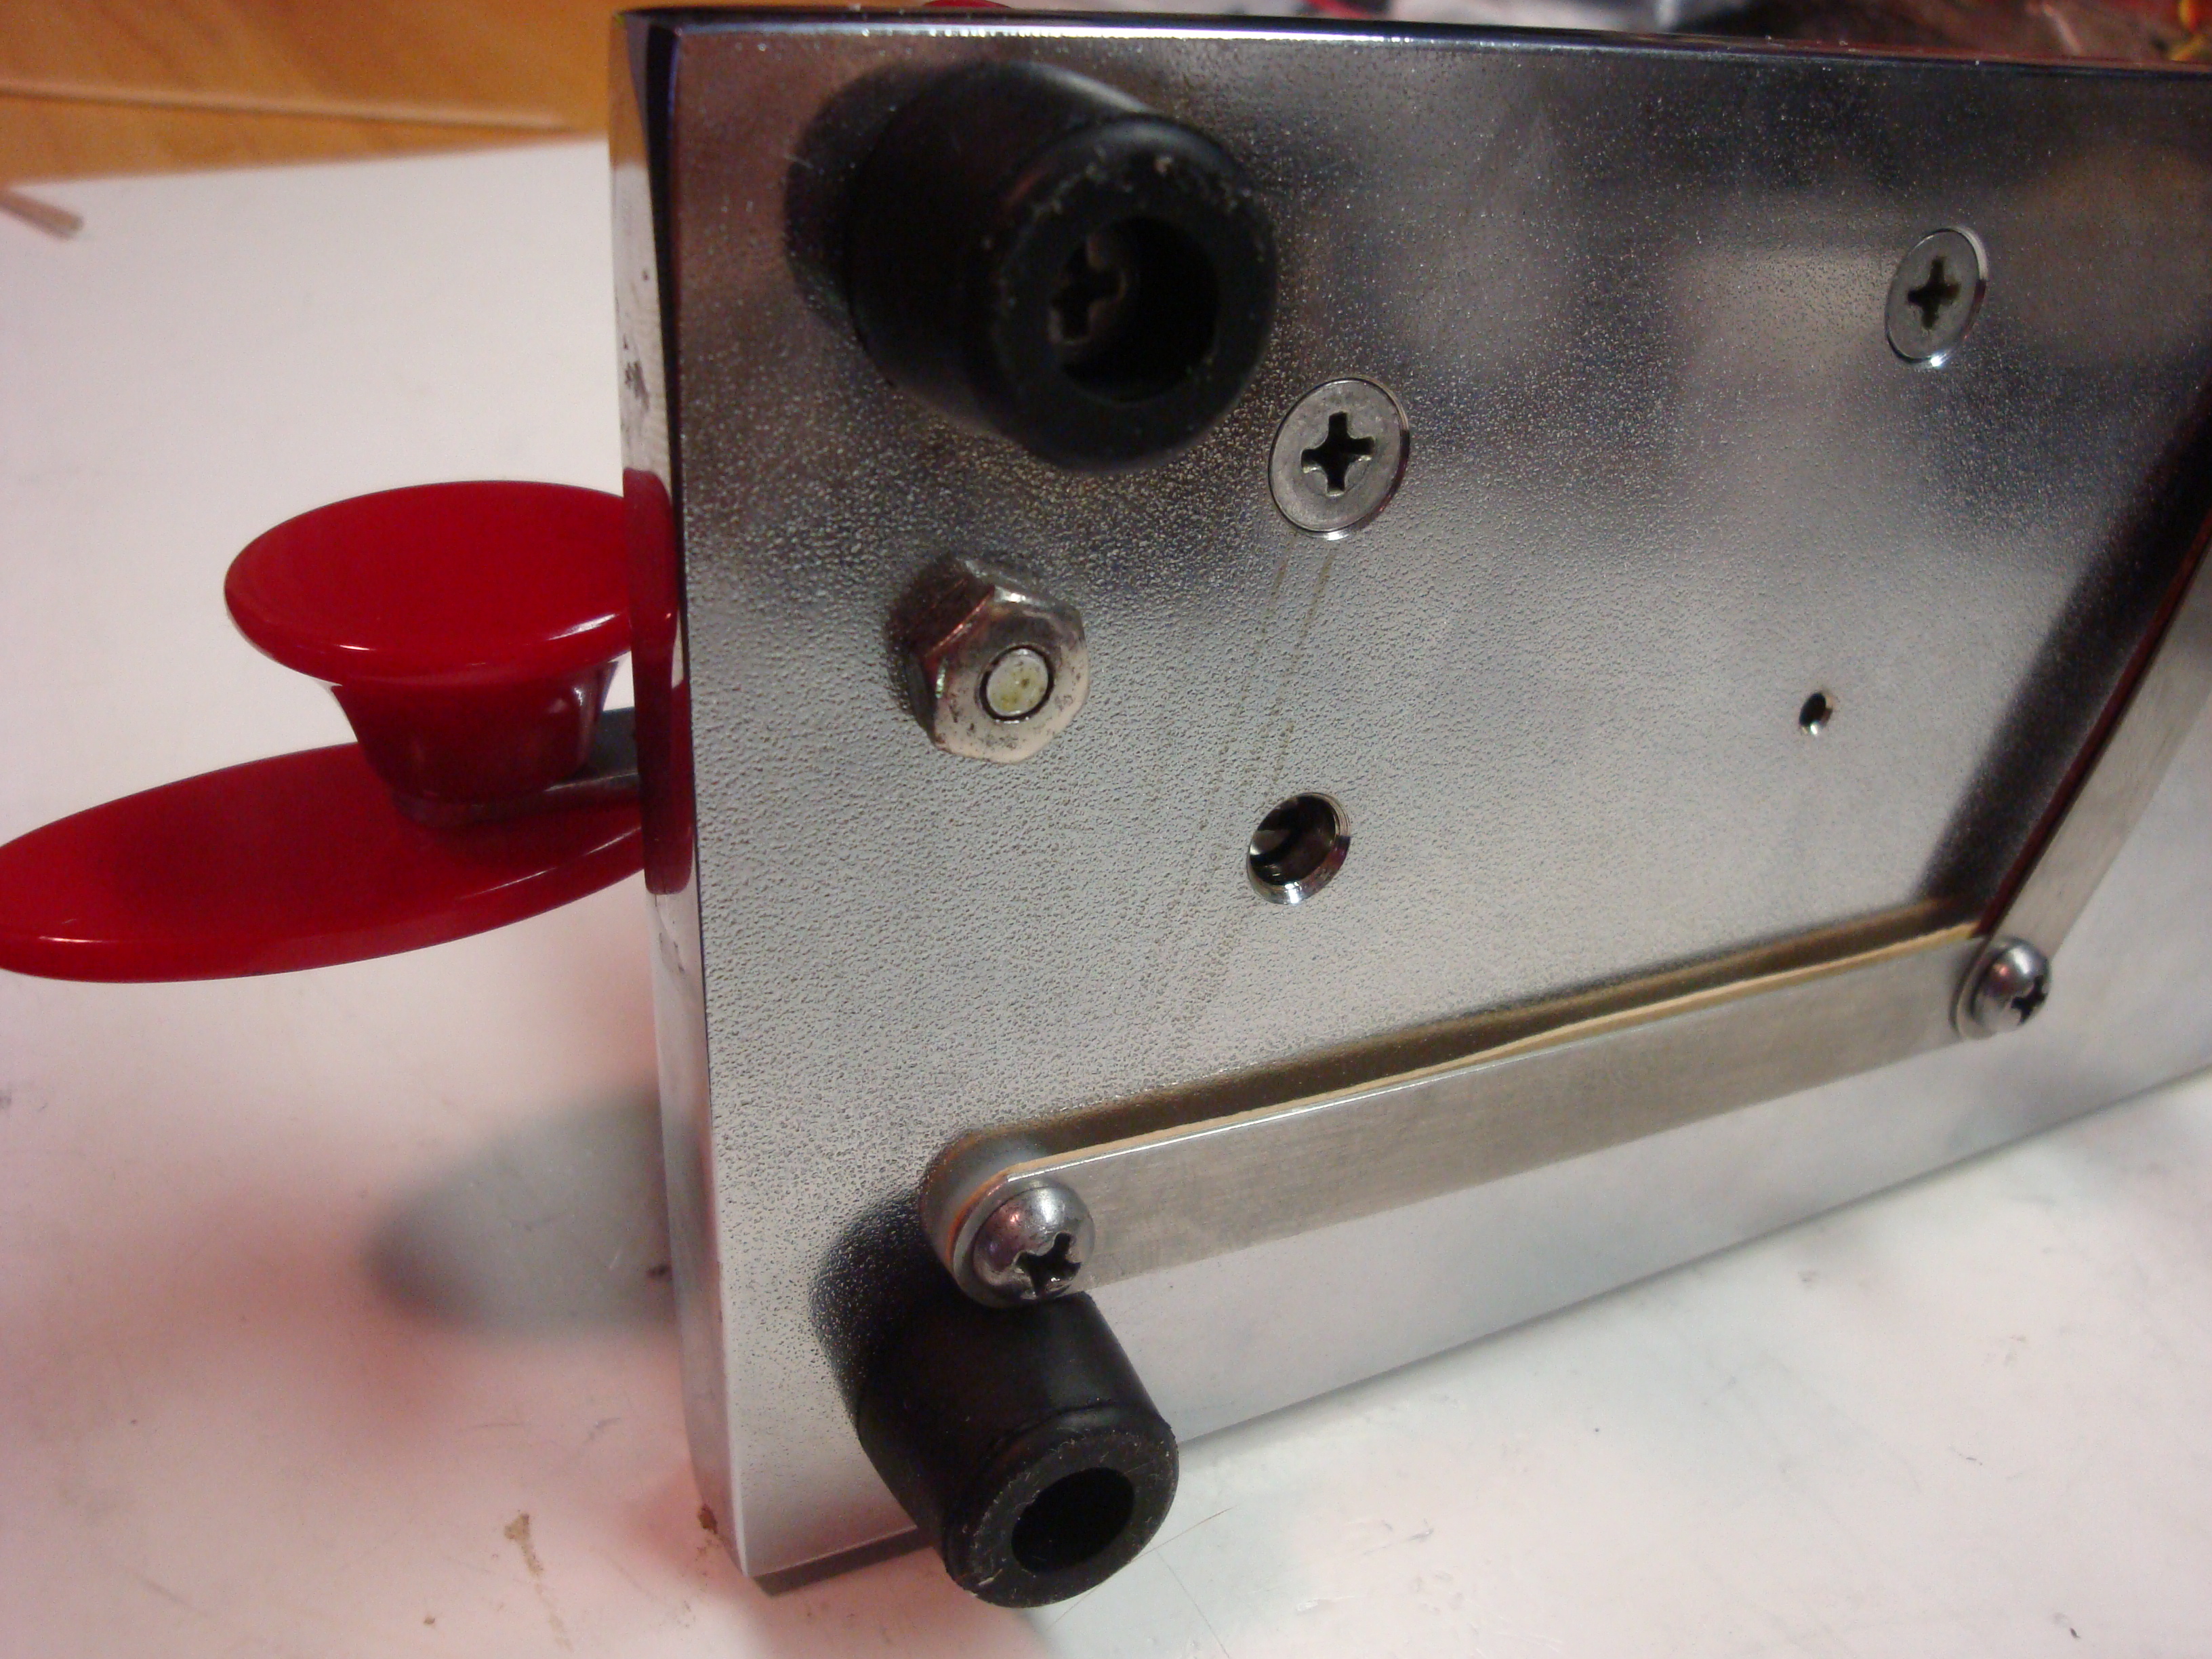
W.R. Smith spends a lot of time describing nickel plating, which many people will not want to do. Coming from the optical disc industry I am used to nickel plating chemistries so it was not a problem. A decent alternative is offered by the Eastwood Company in their tin/zinc plating system. It is inexpensive enough, lasts a long time, and the resulting metal polishes very well. It will oxidize over time if not protected with a polish like the W.R. Smith product, but then again, so will nickel. It is softer than nickel, so it may not be the best choice for wear parts. Here is a picture of the unrestored bottom straps:

Old base, bottom straps unrestored. (click for new window)
And with the new base, and polished, replated and repolished straps:
New base, bottom straps restored. (click for new window)
I wanted to use all of the original hardware, as it is part of the look of the unit, and a lot of it was cadmium plated. After some years, the cadmium plating will combine with atmospheric sulfur to form CdS, Cadmium Sulfide., which gives the hardware a dusty yellow-green finish. If you buff this CdS film hard enough it will come off…but it is not a good idea to breathe the resulting CdS dust, plus the appearance with the cadmium removed is incorrect and the hardware will rust. I decided to research a different procedure. There are various acidic urea compounds which are commonly used to convert silver sulfide (Ag2S) back to metallic silver, releasing an awful-smelling sulfurous gas in the process. One such compound which is readily available is Tarn-X. I was able to use this product successfully to reconvert the CdS to metallic cadmium with a lot of elbow grease and q-tips.
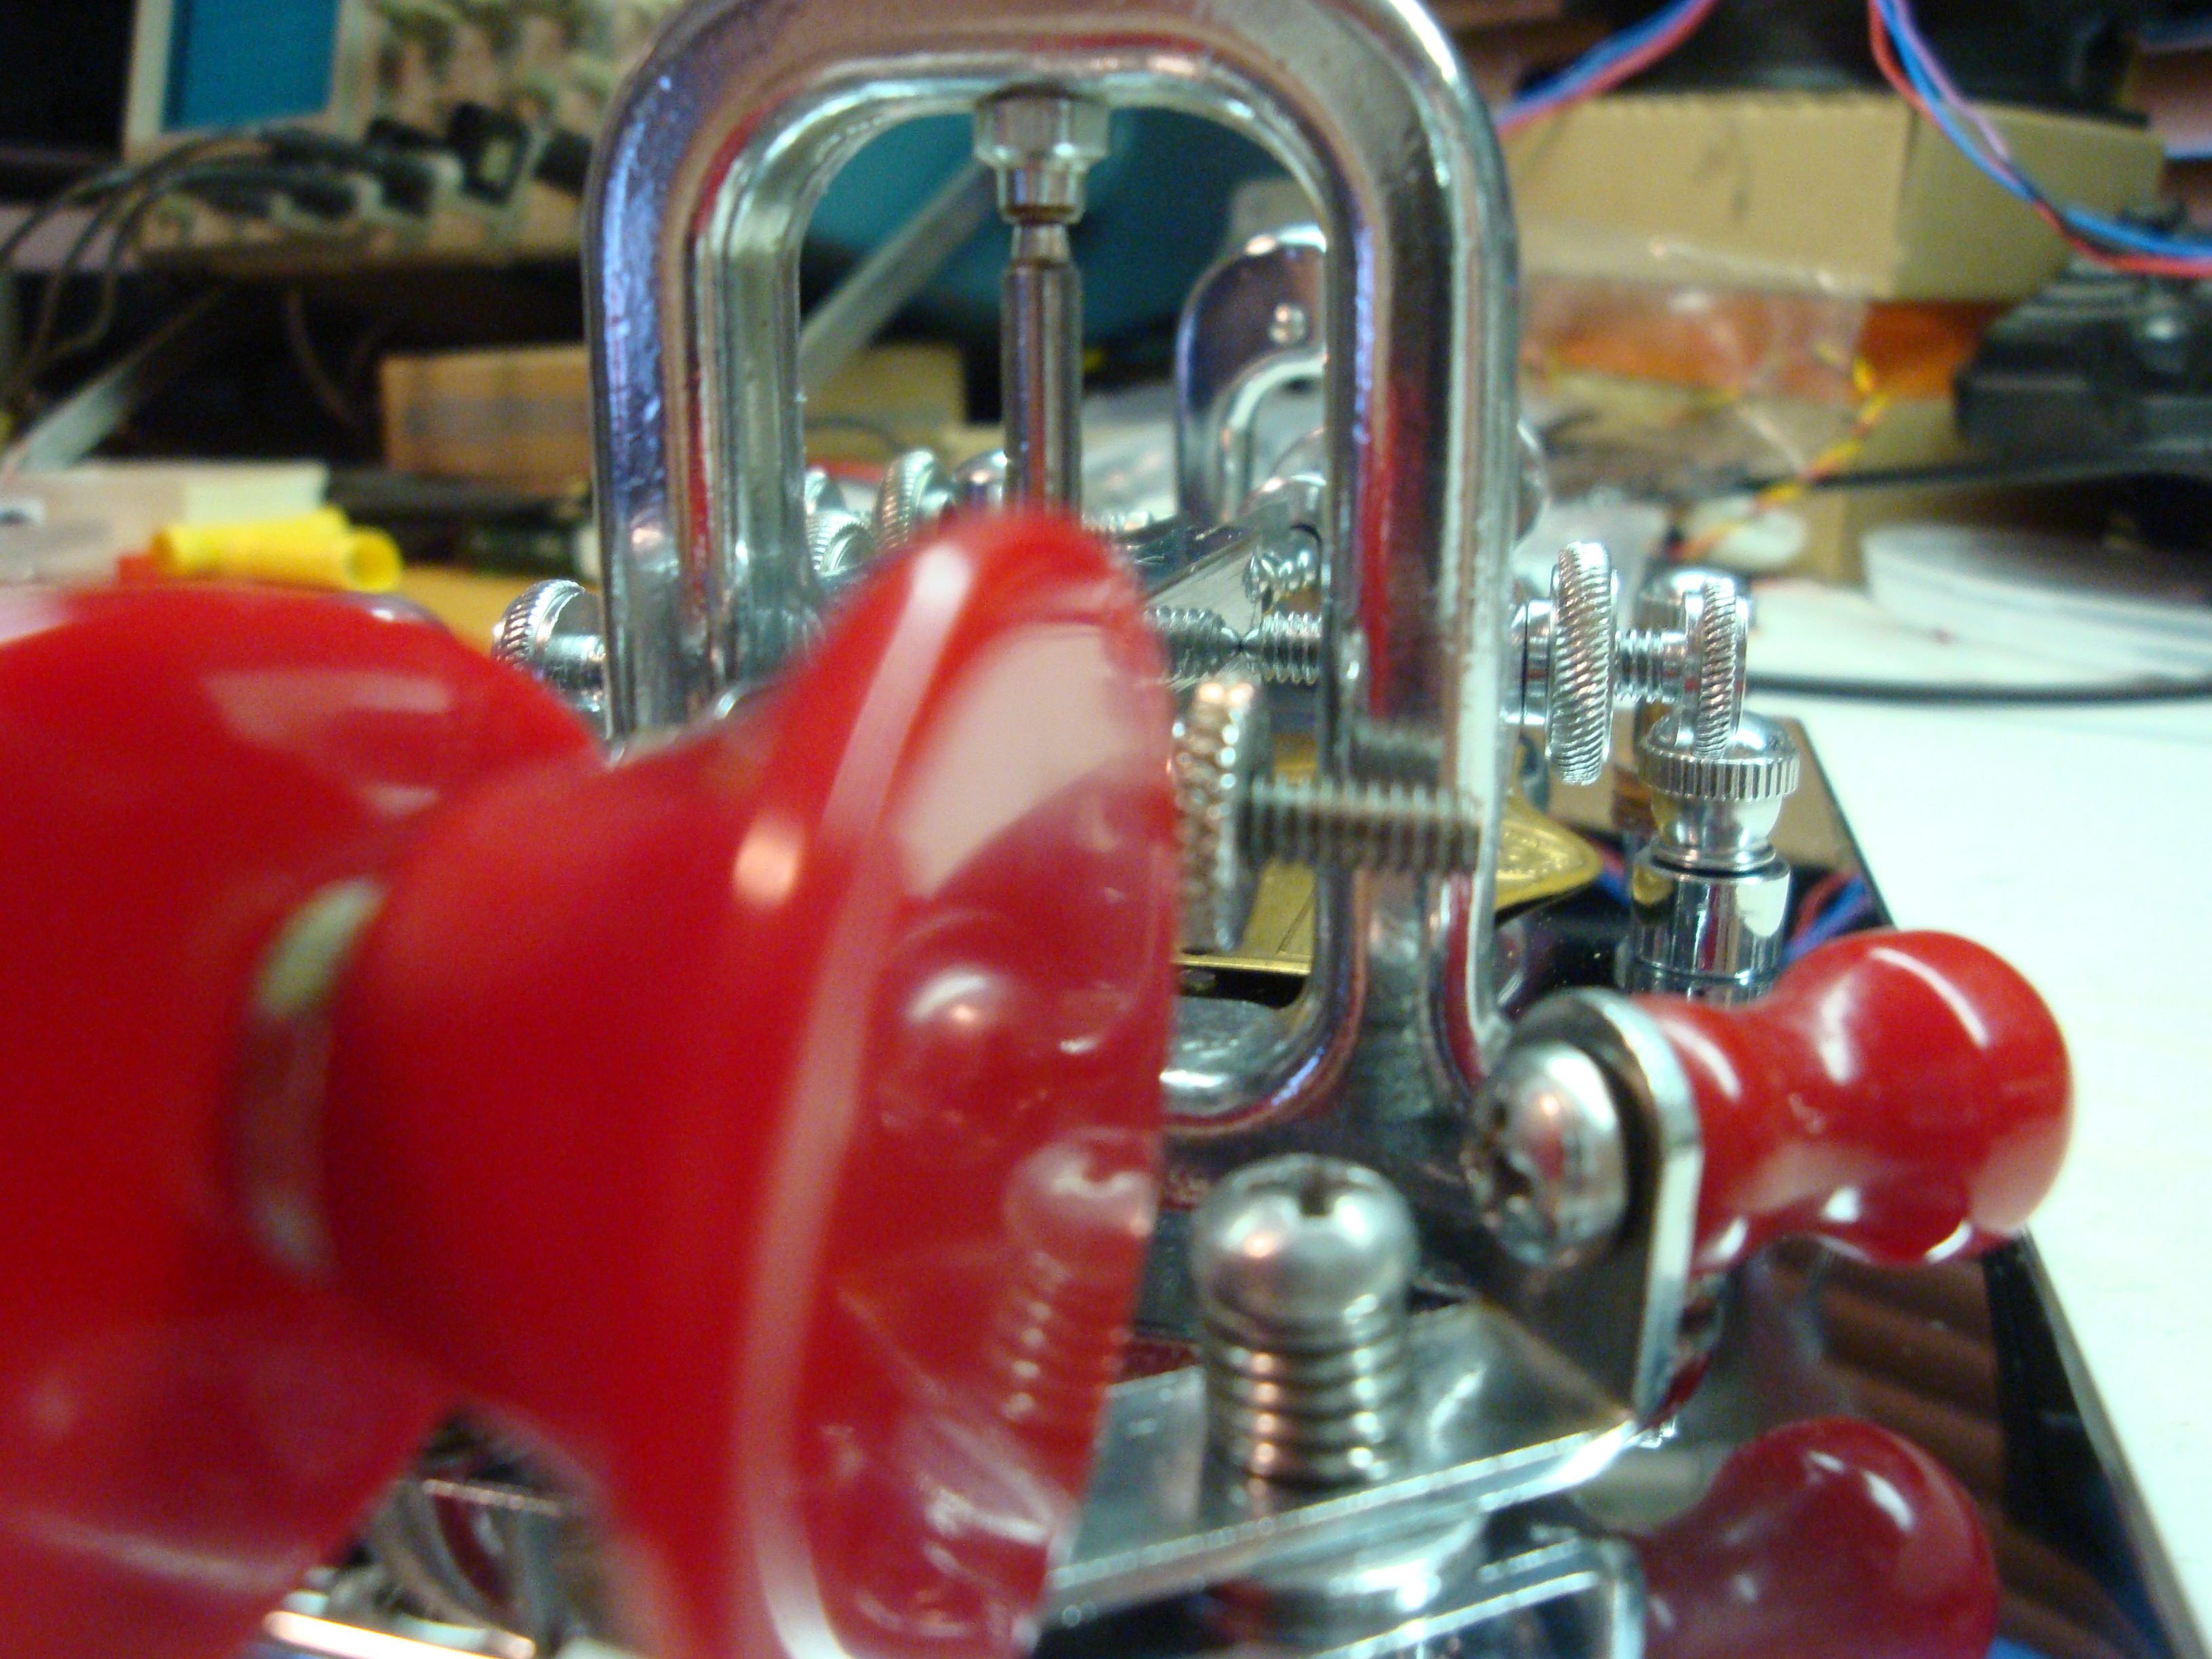
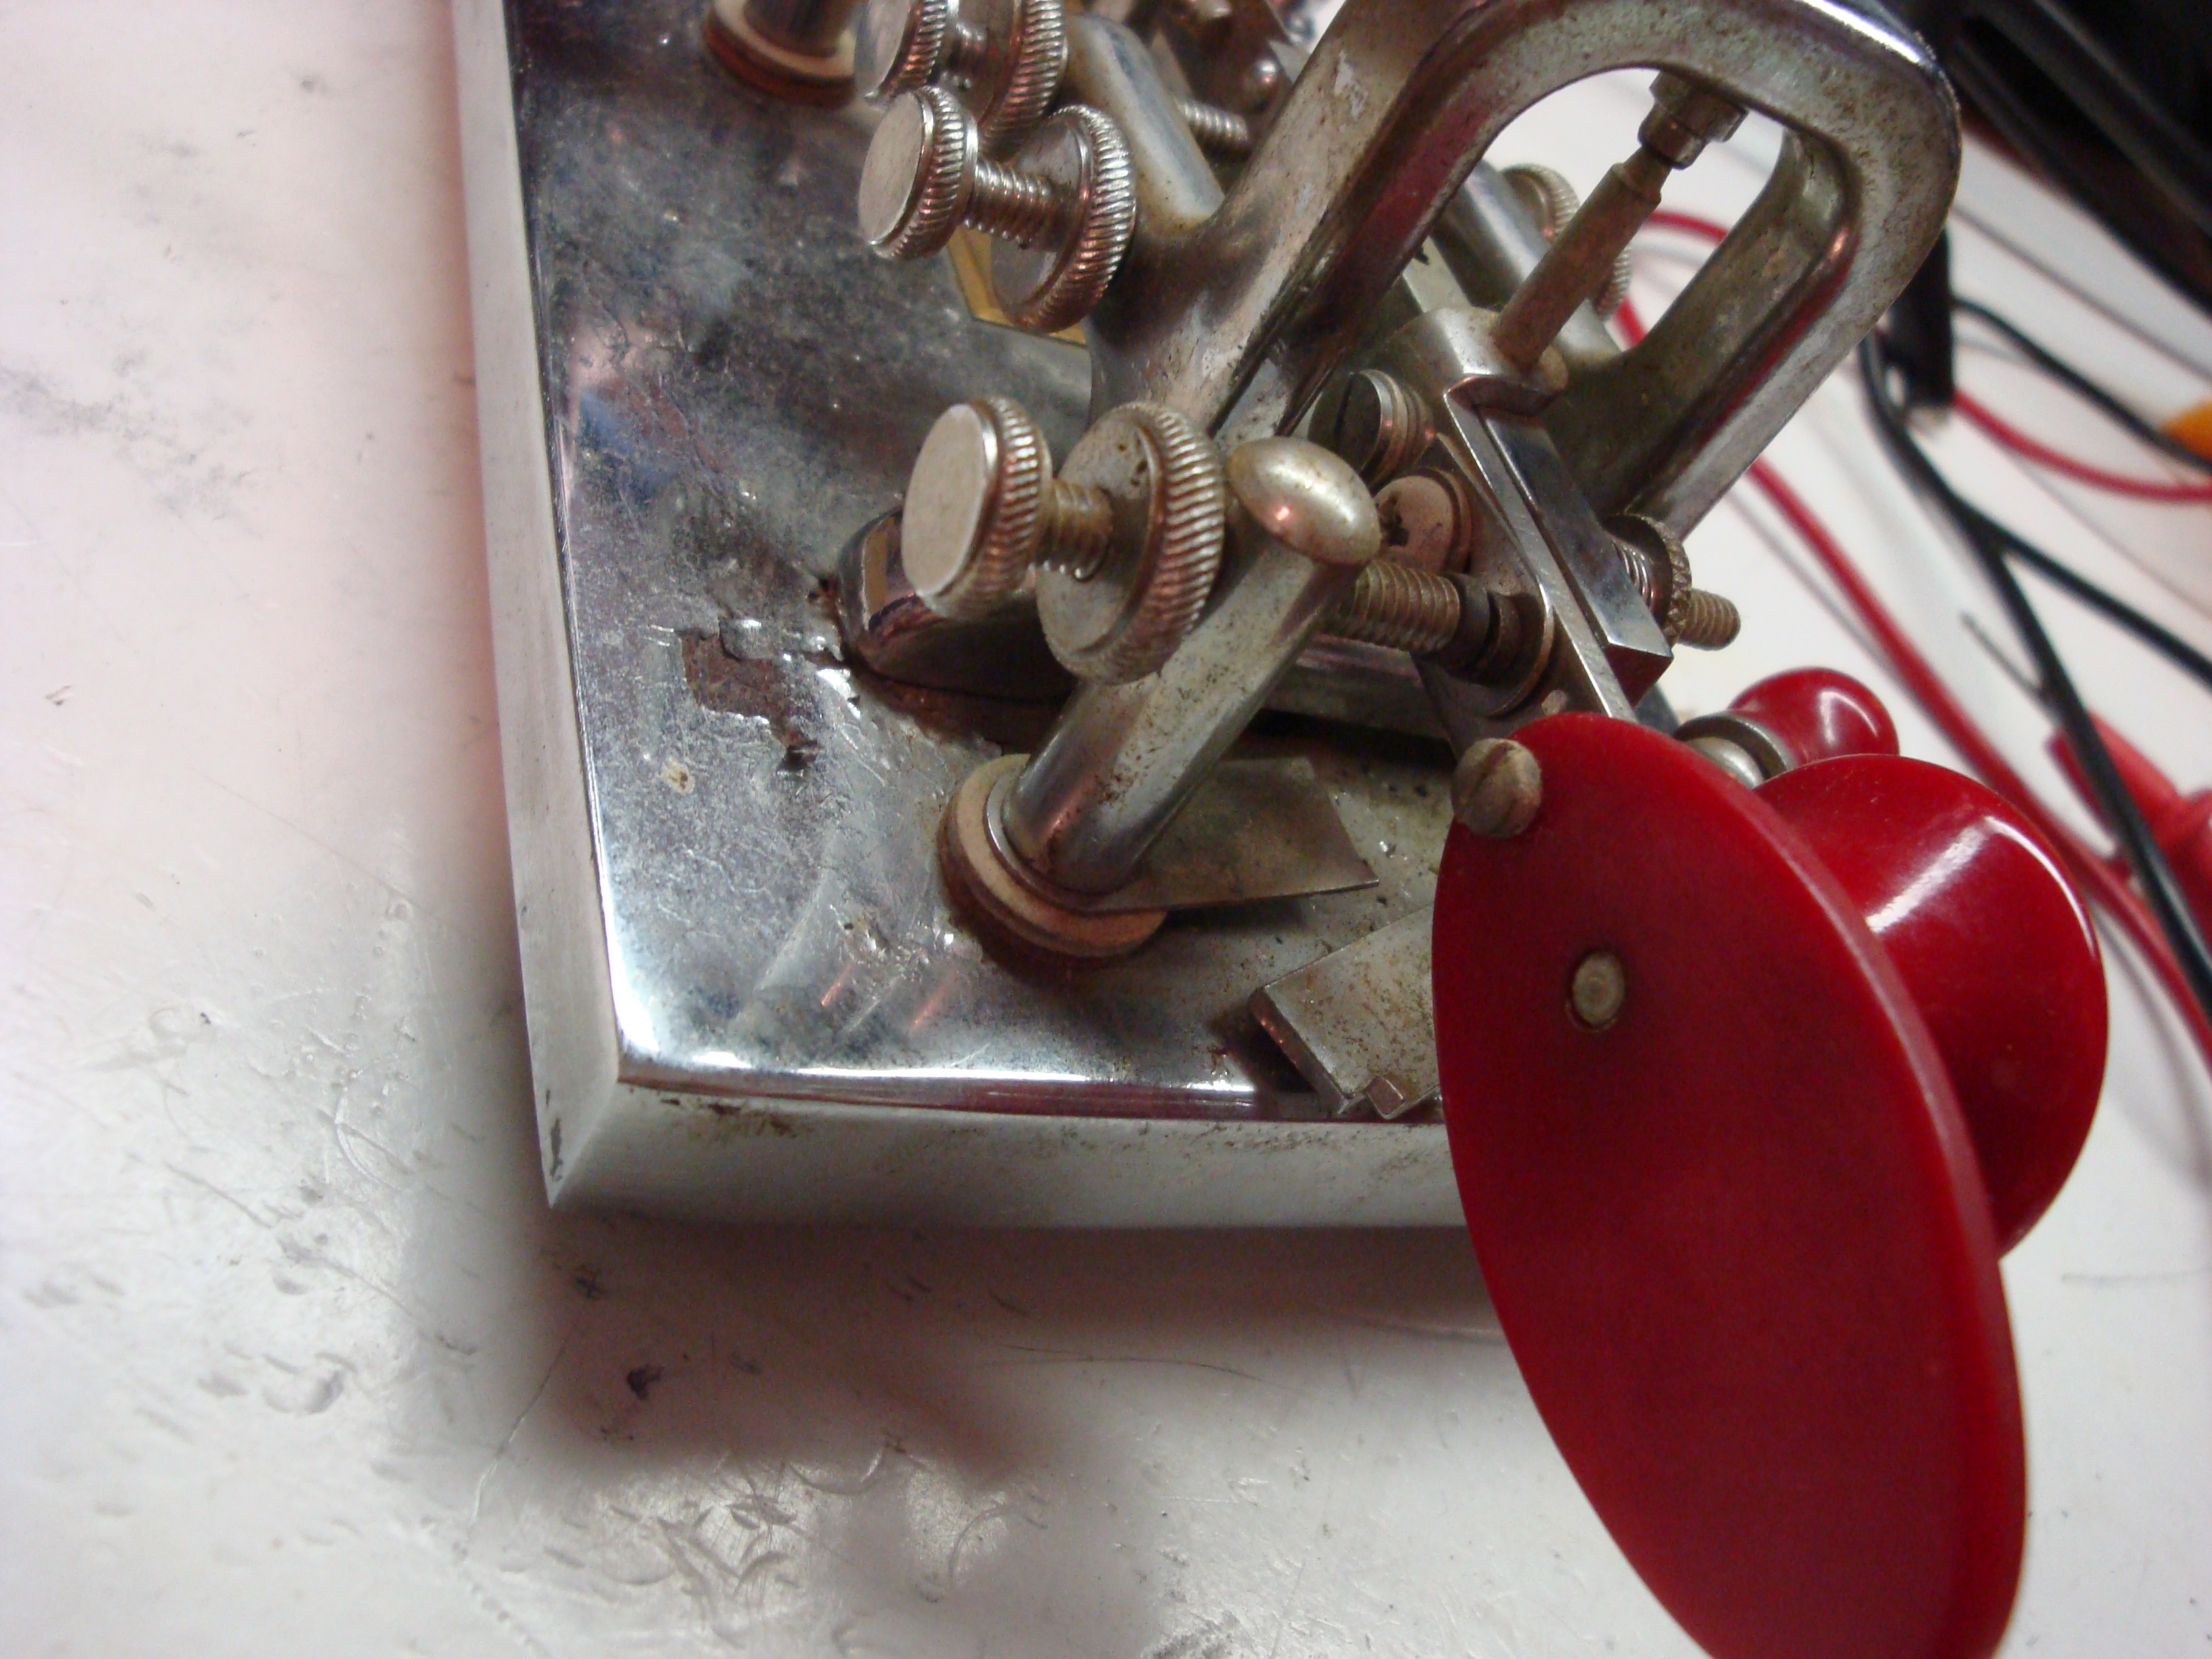
A good example of how the cadmium sulfide appears is shown in the following picture, look at the screw and spring as well as the trunnion pin:

CdS covered screw and spring on unrestored tuning switch assy. and trunnion pin (click for new window)
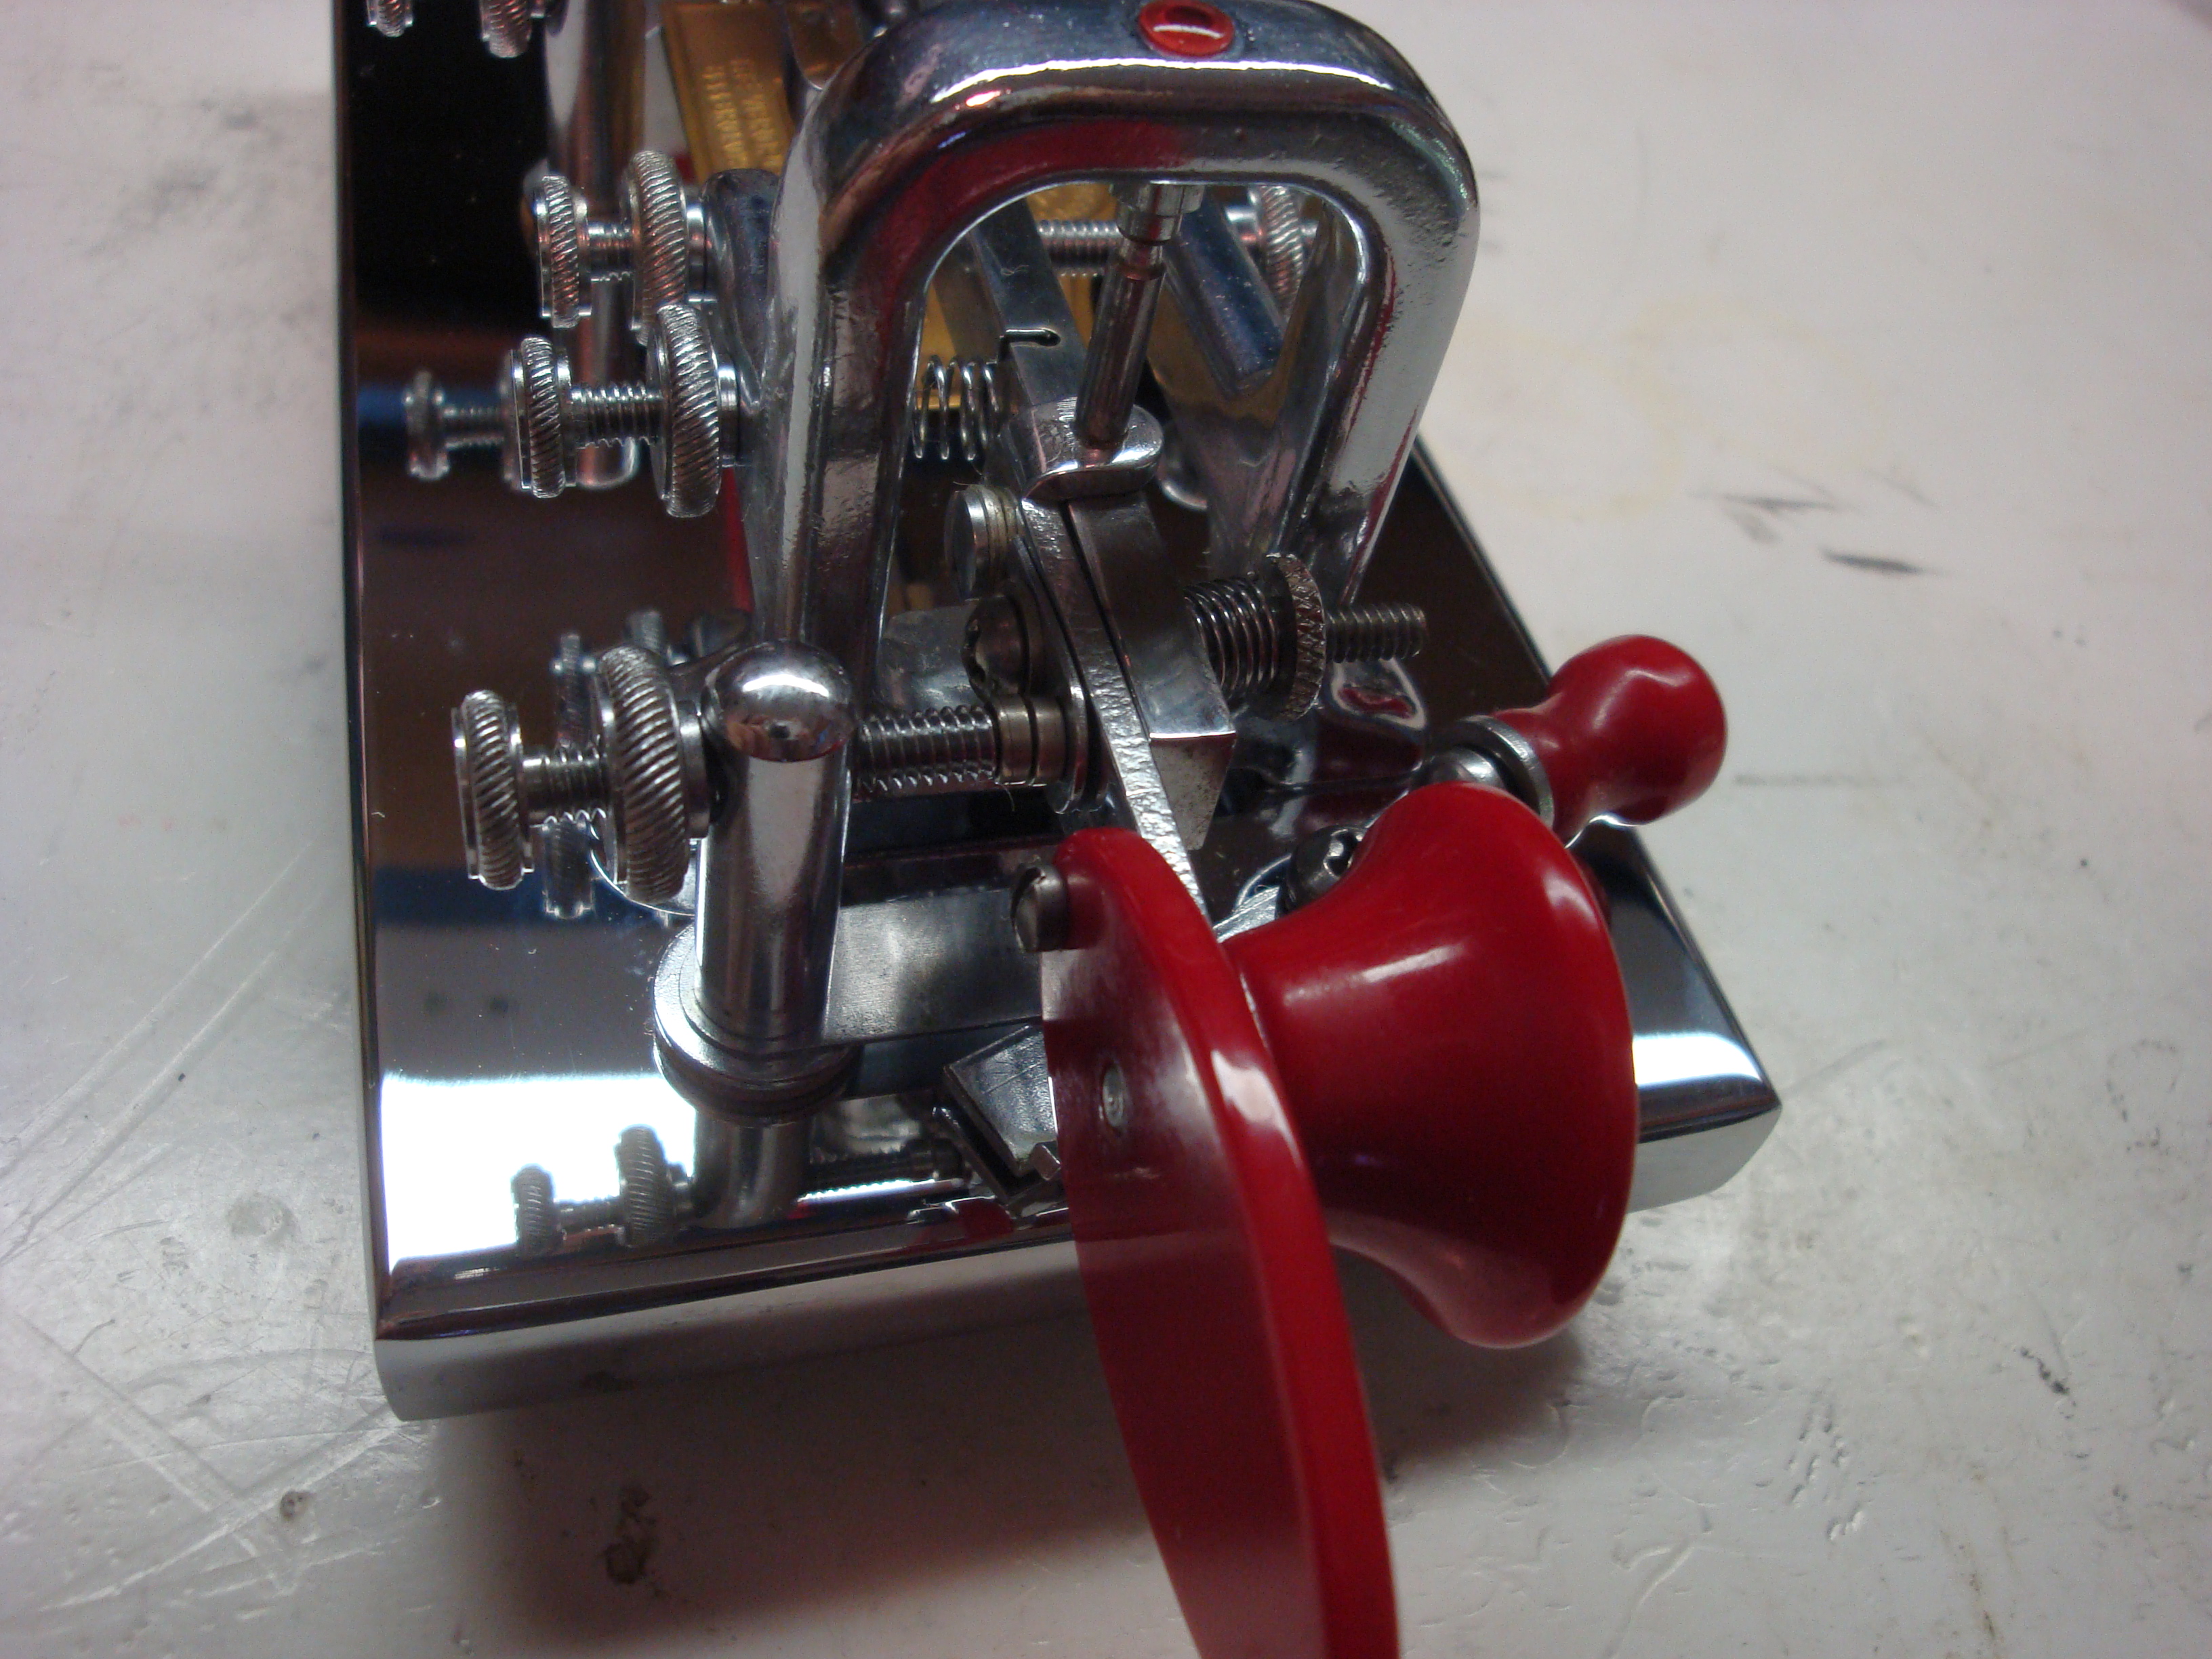
And here they are after a thorough scrubbing with Tarn-X:
Restored tuning switch assy. and trunnion pin (click for new window)
While I was in Tarn-X mode I also polished all four silver contact points, and this being the application it was designed for it worked very well. Expect to use a good amount of elbow grease and q-tips in the process! The contact points were heavily sulfided with a dense black layer:
Sulfided dash contacts. (click for new window)
After the cleaning with Tarn-X this is how they looked:
Cleaned dash contacts. (click for new window)
So in general, all tarnished parts were polished with a Dremel tool and buffs using W.R. Smith’s polish (highly recommended). Afterward they were assessed to see if they needed replating. Parts which were chromed initially were re-plated with nickel, which when polished and protected has a similar spectral reflectance. A quart of nickel plating solution (nickel sulfamate + acidic buffer and surfactant) is currently available from Krohn for $22 on eBay. Other parts for which a more flexible film was desired and which were not subject to wear were plated with a tin/zinc solution available from Eastwood. I would love to have the time to have done a perfect restoration as W.R.Smith performs so beautifully. In my case time was short, and the few parts I polished which still had imperfections were acceptable to me, I made sure they had a coating of polish to retard further corrosion.
The restored bug operates beautifully, and I refuse to answer any comments as to why I have the weights set for such a slow rate. The answer is twofold: although most bugs come with a 0.013-0.015″ thick mainspring, this particular bug came with a 0.018″ thick mainspring which gives it a minimum speed with the weights shown of ~25WPM. Also, and in advance to these naysayers (you know who you are, Jack): switching back and forth between a semi and fully automatic keyer takes a while to learn. Even for someone like me who learned how to send at 35WPM with a bug many years ago, before I built my first iambic keyer (using RTL logic ICs, built into a Ten-Tec magnetic keyer case, but that is another tale…).
At any rate, here is the Bug after a week’s planning and parts ordering, and then a full day’s resto work:
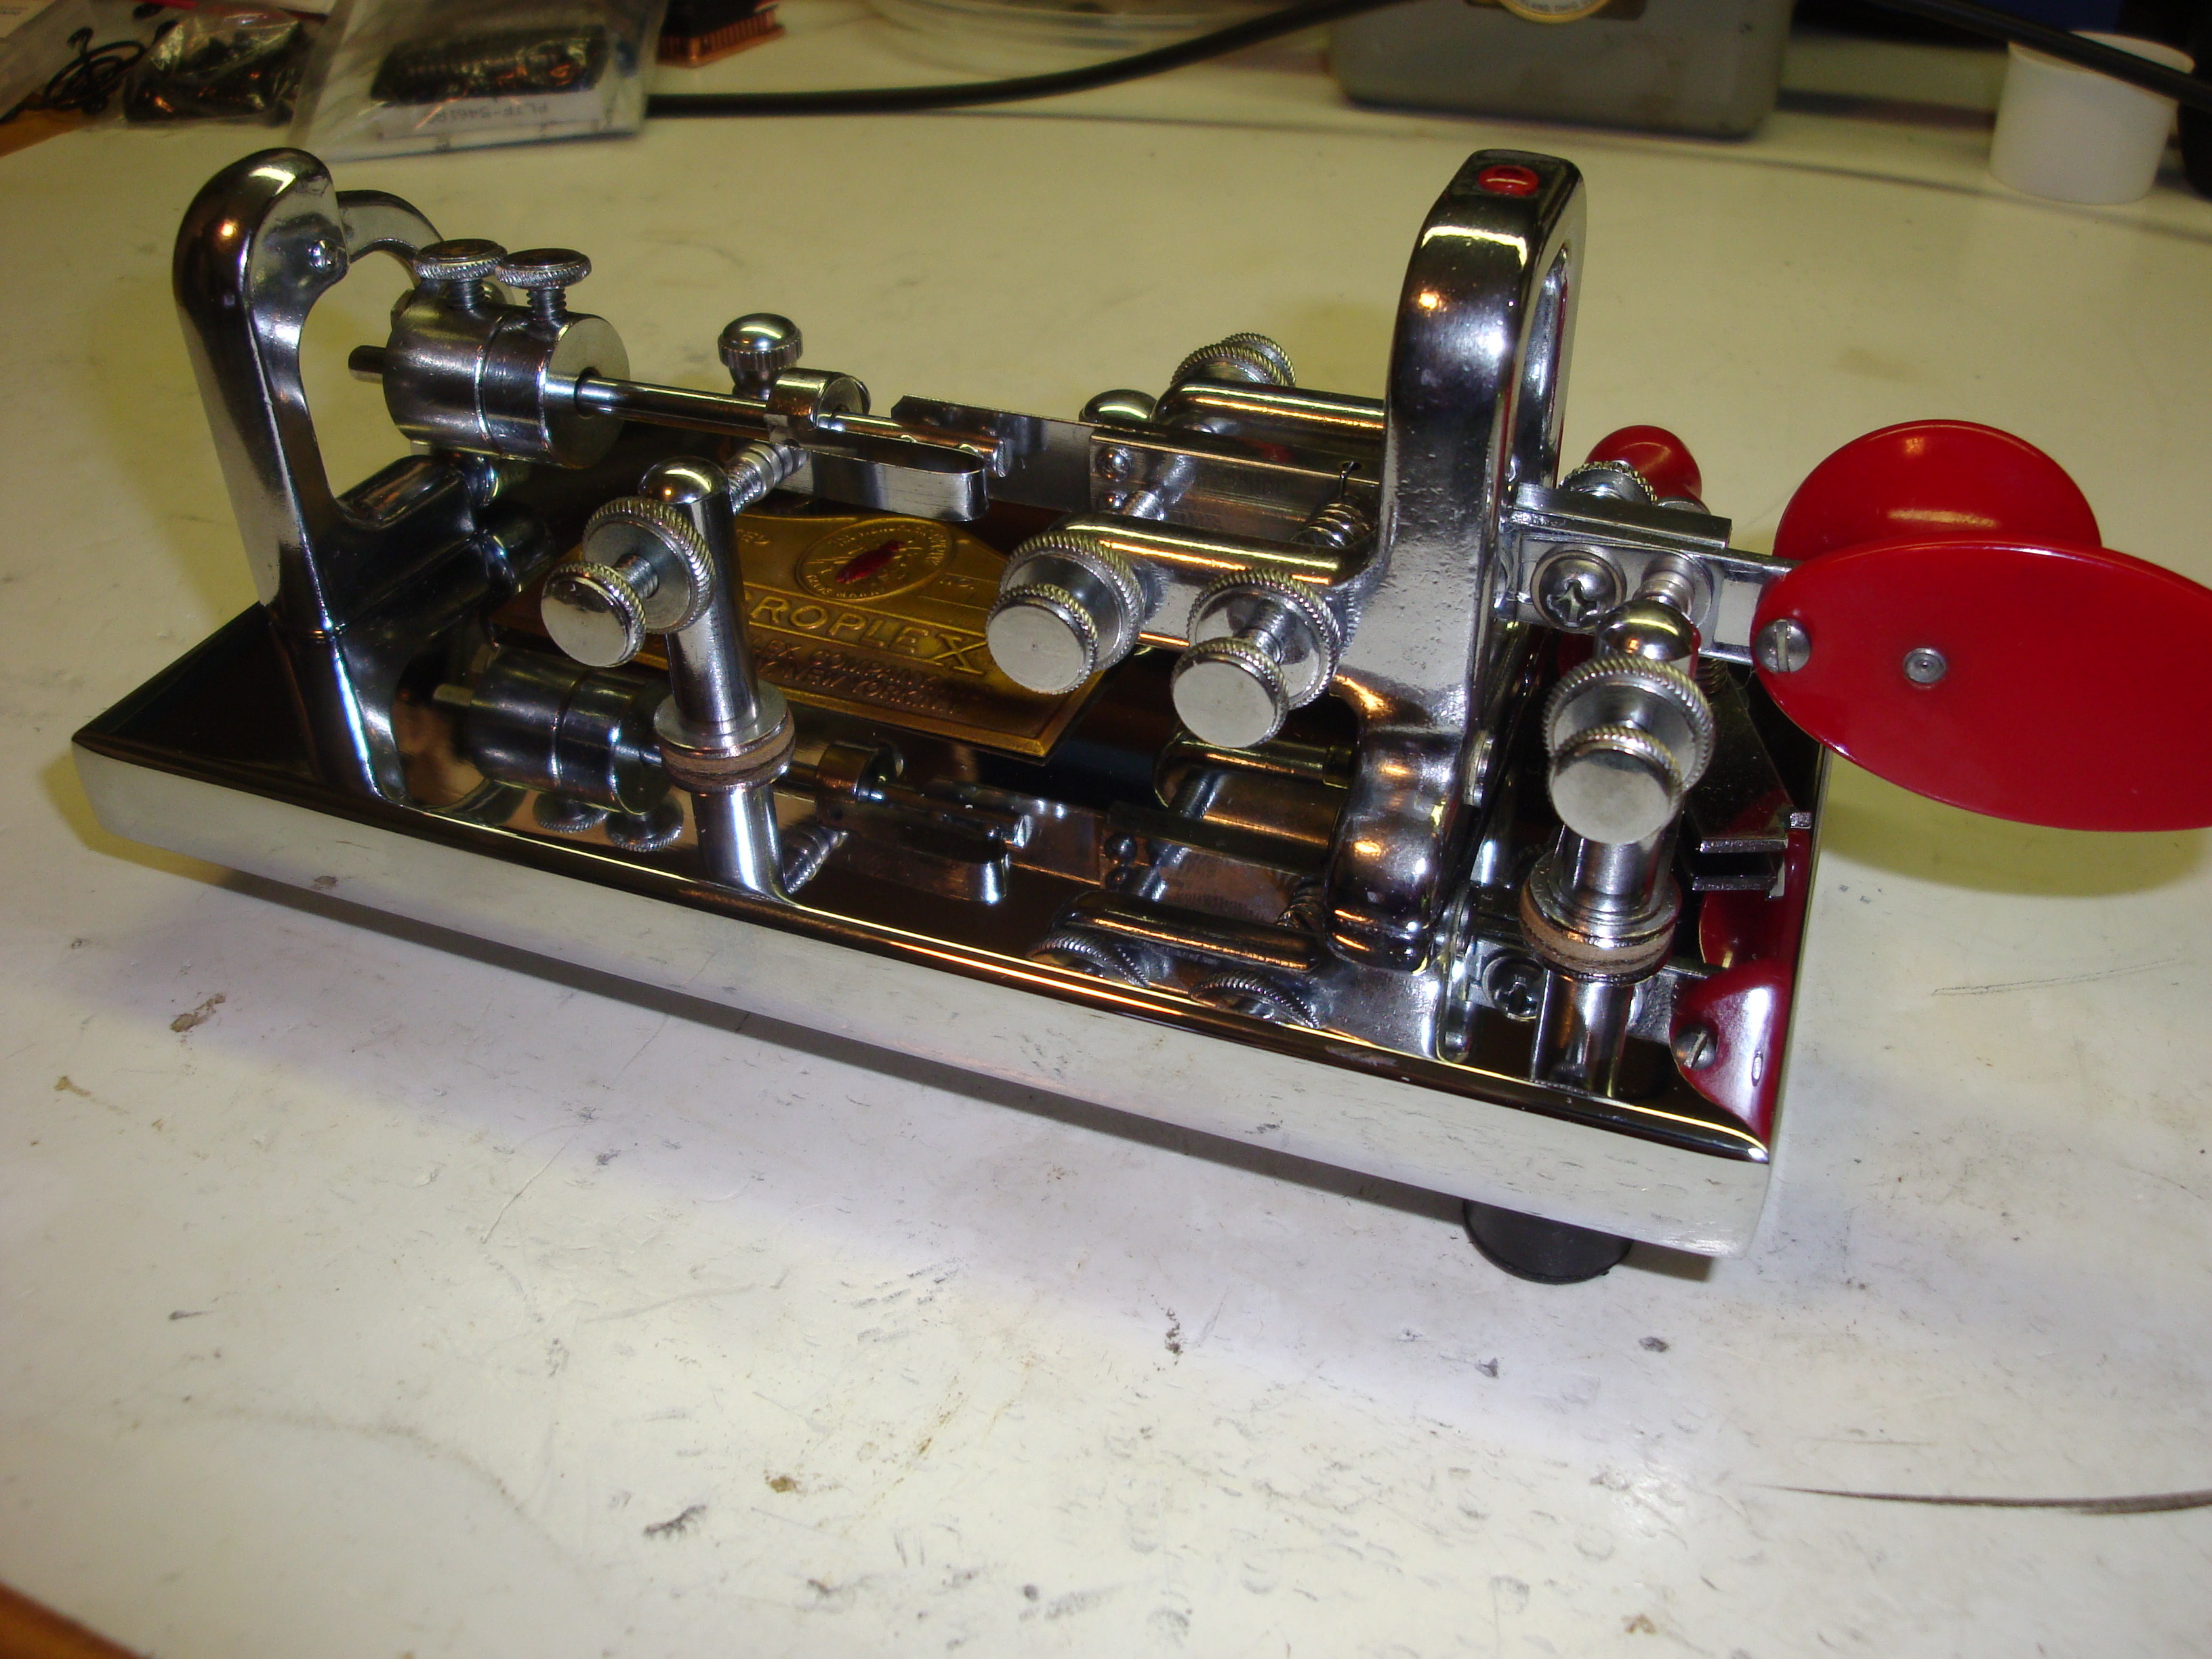
1957 “Original” Bug Restored. (click for new window)
I really like the look of machines like this Vibroplex and my iambic keyer, however I live on a farm and it is dusty. I rapidly grow tired of cleaning precision tools like this with q-tips and cleaner, and trying to keep them dust-free. My solution (short of moving) is to use acrylic covers after a thorough cleaning. These covers will keep a keyer dust-free for a year while allowing paddle access, to me it is a good solution. If you don’t have a dusty location, count your blessings and enjoy your naked keyers, I cannot. I have had them custom made in the past, but Vibroplex offers one for a very reasonable price which is custom fitted to the machine, so I opted to purchase it. When I received it I was pleased by the joinery and appearance (although I thought it could have been 1/2″ shorter). Here is the completed, restored Bug with it’s dust cover:
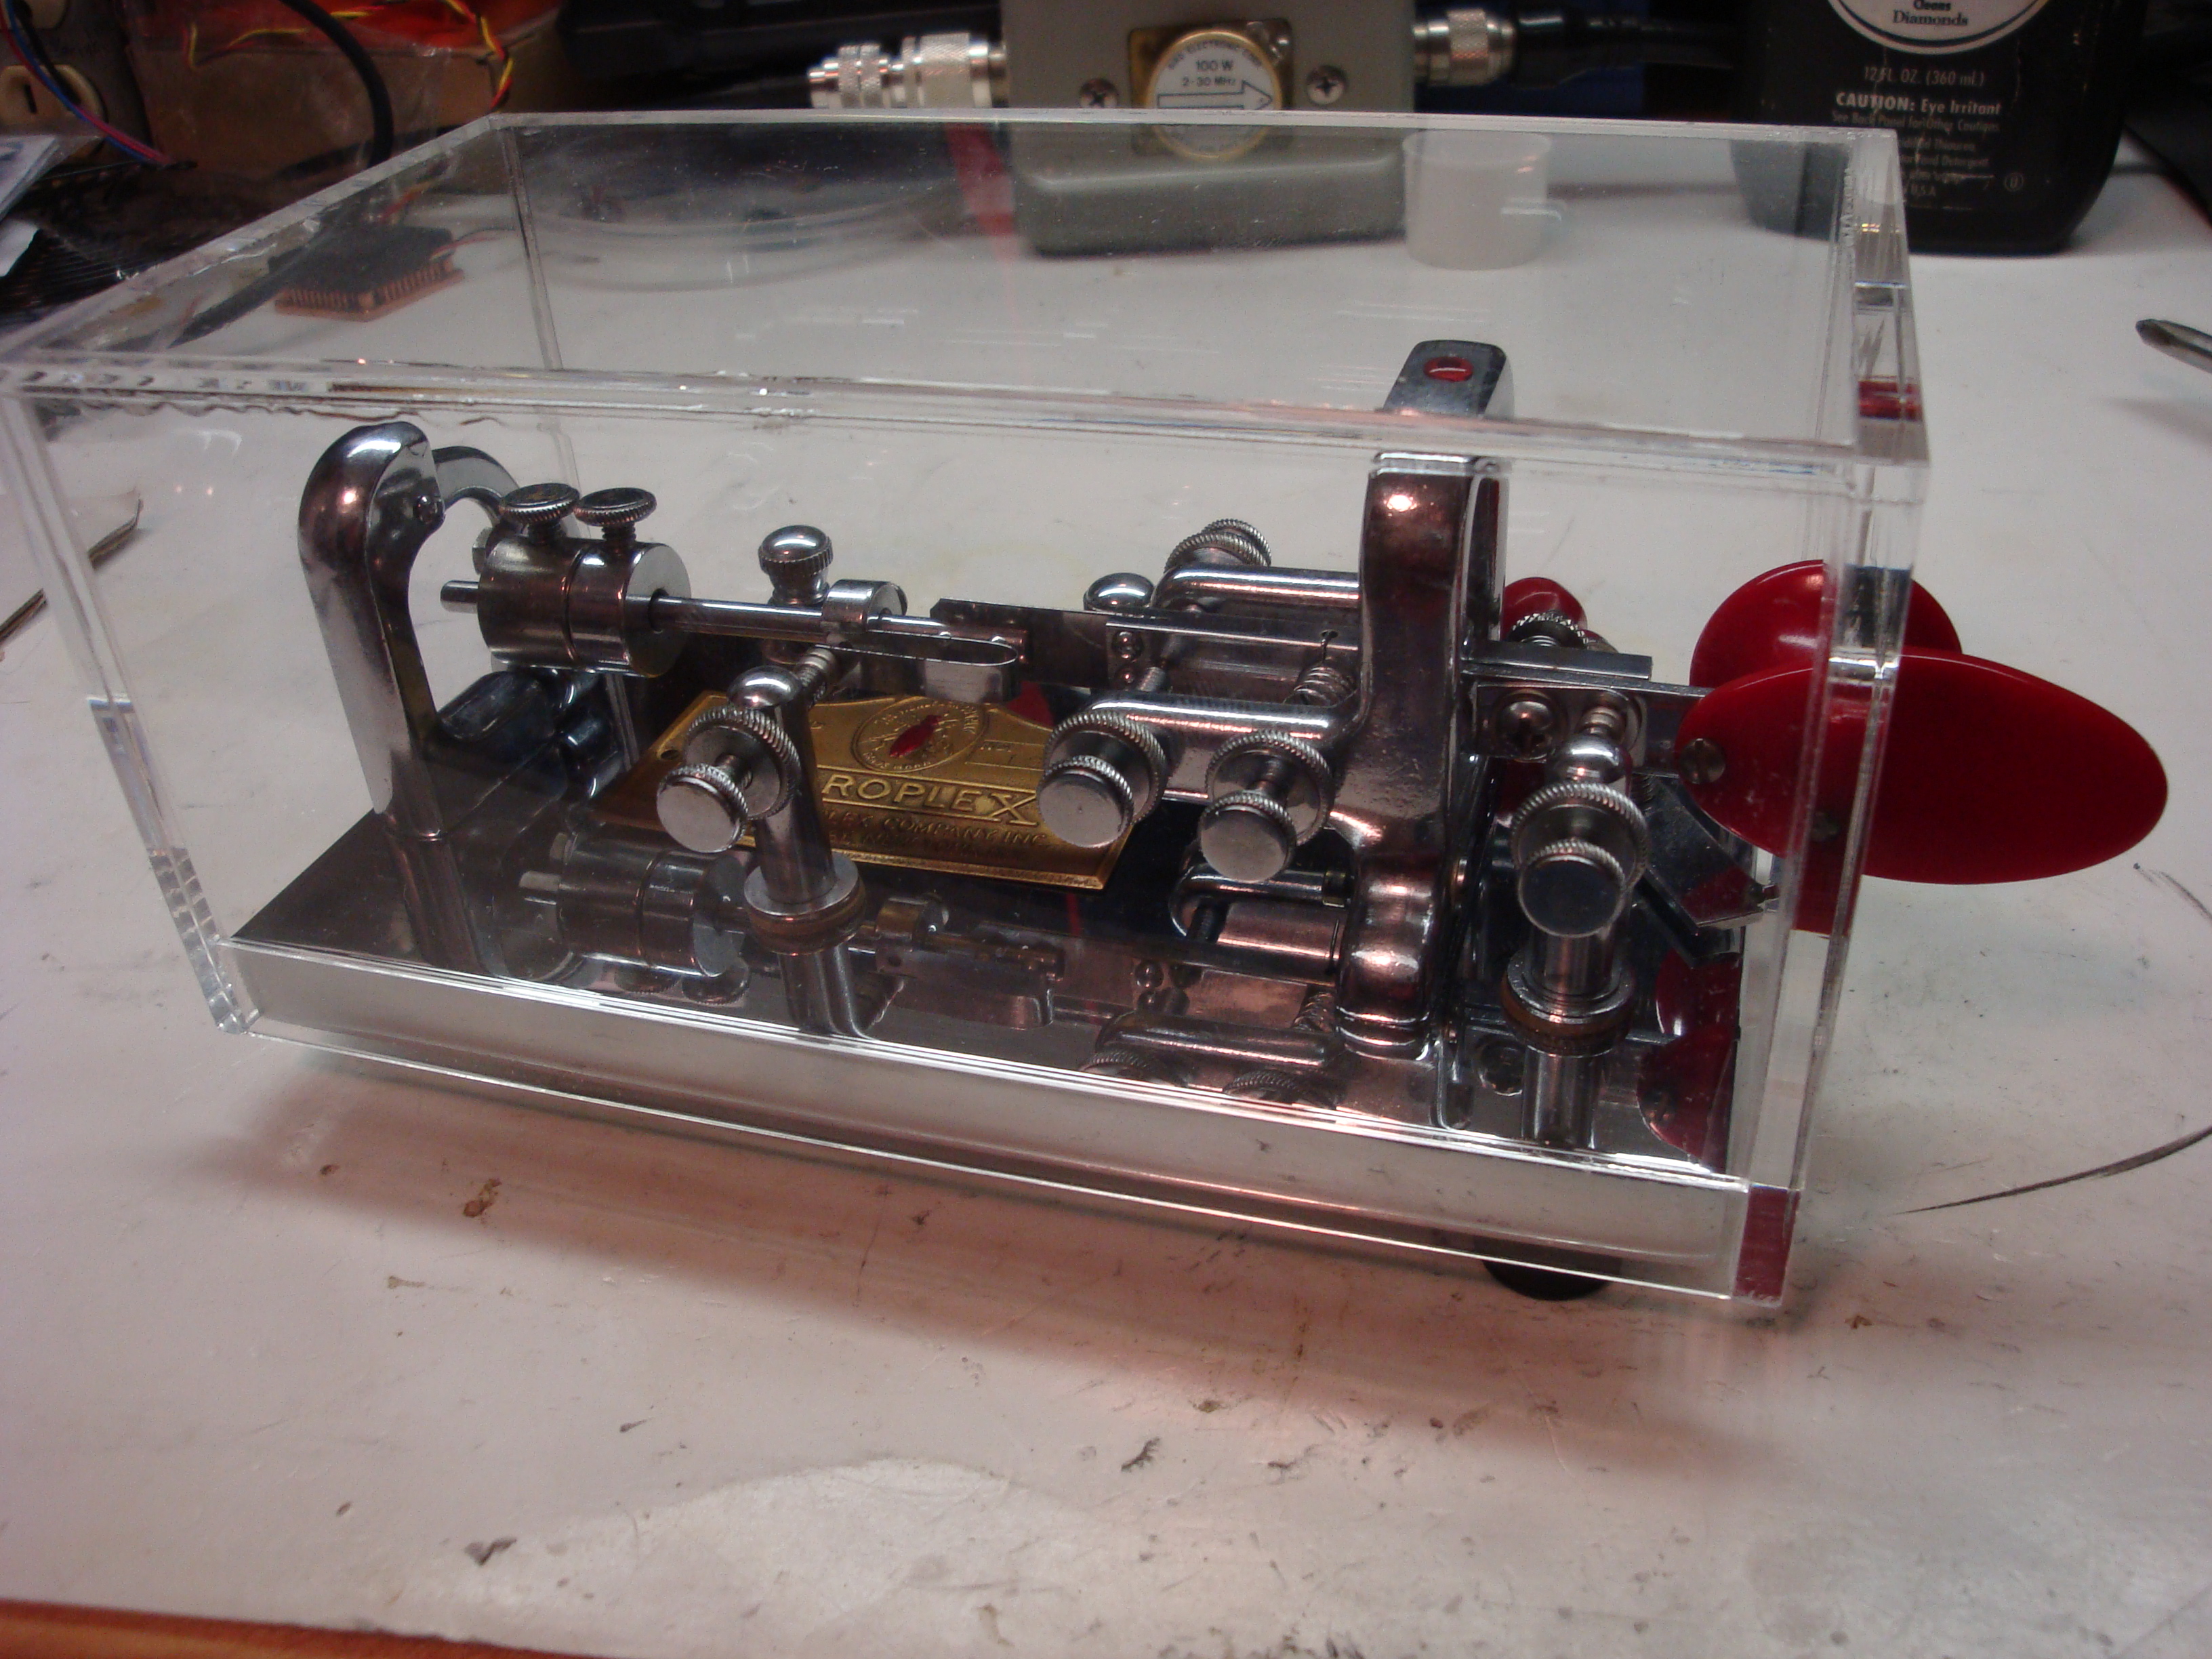
Completed restored Bug with dust cover. (click for new window)
Thanks for sharing your restoration journey. I also restore bugs as a hobby. You can find some of my finished projects in my shop on Etsy, called “RobsHobbies”. I’m always looking for ideas for overcoming some of the technical hurdles of getting that showroom finish back on these old keys. I have been reluctant to do the plating myself. I have found a company that will re chrome the bases for me, but they charge a lot for their service, so I am selective on which ones I am willing to pay the extra cost to have a fresh coating of chrome. You did a beautiful job on that 1957. If you take on any more projects like that one, I hope you will share the story and photos. I love to see new life breathed into these old machines!
73, Rob KE9SQ
Hi Rob!
I appreciate the comments, and I am enjoying making a mess of CW with that bug! Although I learned on a bug, after 40 years of iambic paddles, I am having a devil of a time switching back and forth between them!
You have some really nice items in your Etsy store! Great work cleaning them up! I wonder if Etsy would be a good place for me to sell…?
Cheers & 73,
Howie – WA4PSC
GM Howie;
Just came across your post on restoring the Vibroplex Original Bug. I have a 1964 Champion and a late 60’s Original Bug. Both are FB keys. You did a very nice job restoring the old key. I have a bid in on EBay for a 1944 Zephyr that’s in pretty fair condition. If I’m successful on the bid, I would like to restore the key. It appears to be in good working condition, but does have some light oxidation and rust here and there. I would like to put the key in excellent condition if possible. I have no experience with plating metals, but am willing to give it a go. I have done a little bluing, but that’s about it! Anyway, thanks for the great article on restoring your key and hope to see you on the bands someday!
Very 73,
Wyatt – KF7YHB
Hi Wyatt!
I wish you lots of fun restoring that bug, it is an enjoyable way to pass the time, and the results can be very gratifying!
Cheers & 73,
Howie – WA4PSC
Hi Rob:
You did a nice restoration job on the old 1957 Vibroplex Original Deluxe.
FYI: The nameplate screw-nail (hole spacing & hole diameter) was changed soon after Mitch Mitchel bought the Vibroplex Company and moved its operation to Mobile, AL
There is something really rewarding restoring these old bugs to as near as like new condition.
Regards, Donnie Garrett / WA9TGT
Hi Donnie,
Thanks for the comment, and info about the nameplate. It is great to be using a bug that you yourself restored for sure!
Cheers & 73,
Howie – WA4PSC
Hi Howie,
Thanks for publishing the photos and process of restoring your bug. I have several bugs here in varying degrees of need (for restoration), but no experience with plating or other chemistry methods, except for etching circuit boards with ferric chloride. I will get some Tarn-X and look into the Eastwood product.
One question: how do you remove the serial number nameplate without bending or damaging it ?
Thanks again for the great tutorial!
73,
Jim W4QE
Lynchburg VA
Hi Jim!
With the chemicals available on eBay, nickel or the Eastwood tin plating are pretty easy to do, and the results can be very good if one remembers that the plating is so thin the surface prep before plating is what determines the final appearance. The plating just makes the color even. On my bug I removed the nameplate by driving the spiral nails out with a small nail inserted in the hole in the bottom of each nail.
Have fun & 73!
Howie – WA4PSC
Hi Howie!
I also enjoy refurbishing old Vibroplex Keys, mainly the Vibrokeyers which I have about 6 at this time. I really enjoyed your article and it turned out just beautiful. It is so gratifying to me to bring these keys back to life and get them in the hands of good Morse operators to once again hear the sweet music they make on the air. Again GREAT work my friend.
Regards,
Ron – N7RD
Ron,
Glad to see your note since I have a keyer that needs repairing. Do you do repairs for others?
I have limited technical expertise and need help – the keyer sends dits when I hit the dah paddle.
Do you do repairs, Ron? I have vibroplex original keyer that needs some work done. Please advise.
Nice job on that bug!! Hopefully we’ll have a chance to hear it on the air!
73
Dave
WA7AXT
Hi Howi,
Thanks for sharing your experiance with us.
Great job! Good page!
I got just an old lady, #4 blue racer, from 1919 in good condition and searching for spareparts.
Can you help me with coordinates?
For my old/ new lady is just best good enough.
vy 73
Ingo
DL2AAA
Hi Ingo,
You may already know of this, but I looked up parts at the Vibroplex Parts site:
http://www.vibroplex.com/contents/en-us/d9153.html
Good luck!
Howie / WA4PSC
Nice work on your bug!
I have a VibroKeyer, which was dropped and suffered a lot of bent-parts. A prior-owner very nearly stripped the screws out of the bottom of the main frame.
So, I decided I liked this older unit, and spent as much on repair-parts from VibroPlex as a new VibroKeyer would cost :-O
The parts arrive, and I see:
-nicked chrome on the Lever Arm
-pitted plating all up one side of the Mainframe (pits appear to be the result of casting, prior to plating)
I don’t really know what to think, at this point… But I’ll admire your overhaul in the meantime!
-Gord / VA7GP
Hi Gord,
That is disappointing to hear, have you notified the folks at Vibroplex of the problem? Scott may not know the quality of the parts is slipping, I have a booth right next to him at Xenia and he seems like a good guy. I wish you a good final product to your efforts!
Cheers & 73,
Howie / WA4PSC
You should have contacted Scott right away.
Hi,
These bugs have a rich history.
That’s a Standard Deluxe. As evidenced by the chrome base and red jewel on the top indicating jeweled trunnions & re finger pieces. The “tuning lever” isn’t. When land line telegraphers completed their traffic, they closed that switch so the telegraph voltage path would then be completed for other telegraphers. They were all in series. hihi
IMHO, you should have left the patina and otherwise just cleaned & adjusted it. The new base plate no longer shows the silkscreened information on the bottom, removing provenance.
Hi George!
Thanks for the comments, I hung onto all the old parts including the original base in anticipation of perhaps reusing it. The plater I work with can do masking, so if I have it rechromed I can save the nomenclature on the bottom. I knew how telegraphers used the shorting lever, but being a bit too young to have experienced land-line usage of a bug I have only seen it used to key a tube transmitter while tuning.
Also I agree manufacturers need feedback in order to know how they are doing, hopefully Scott has been notified of the product defects.
Cheers & 73,
Howie / WA4PSC
I have a Lightning bug date unknown because the name plate is missing. It has been re worked with several mis-matched parts like binding posts that don’t match and is painted an odd textured green base. I have seen one other this color. My guess is the name plate was removed either because it was stolen from work or lost when repainted. It seems much faster than my 1990’s deluxe. Are the Lightning bug models just one square sliding weight? Anyone seen the odd green base? 73’s